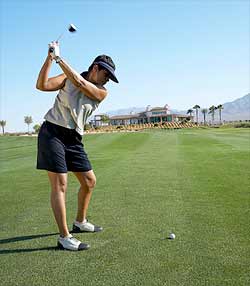
Thursday, February 11, 2016

Yoga for Golfers

Yoga for Golfers


Yoga for golfers has so many benefits, yoga is an exercise that uses poses and stretches that can improve flexibility, strength and balance. Properly practiced, yoga breathing also can be calming. Yoga increases flexibility and flexibility increases the ability for a golfer to generate club-head speed. Golfers may be prone to one-sided or uneven muscle development.

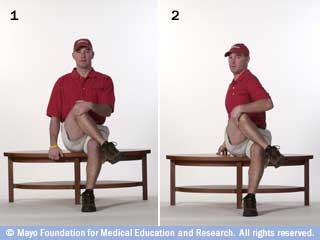
Yoga postures can strengthen weak areas and help ease muscular tension. Golf can also lead to tight hips, quads and hamstrings so golfers benefit from poses that open up the hips and stretch the hamstrings.The golf swing requires stability and flexibility of the hips and thoracic spine. A regular yoga practice can help address these issues.

 Golfers will also benefit from upper body strengtheners like down dog and plank and here I will show you some of the Yoga Poses that will benefit you most.

Golf requires a great deal of physical skill and practice, so you need the mind to be as calm ad possible so it is easy to focus on the task at hand. The emphasis on  breathing and mind-body connection in yoga is essential in helping for golfers to develop mental acuity, patience and concentration.

Some of the best Yoga Poses for Golfers


Downward Facing Dog
Cat Cow Pose
Pigeon Pose 
Plank
Chaturanga
Triangle Pose
Revolved Crescent Lunge
Bird Dog of Kneeling Balance
Eagle Pose
Crow Pose
Mountain Pose

Here you can get your Free Yoga lessons  , just 15 minutes a day

Revolved Crescent Lunge


Sunday, April 15, 2012

Golf Core Exercises

Here are some of the best golf core exercises I have used in the past 30 years of playing golf.


The older we get the more important it is to warm up before playing golf and for golfers it is important to target the core muscles to add flexibility (and potentially more yards through a greater coil) and avoid against injury.

Golf stretches for your core muscles

Stretch your core muscles:

Your "core" is, very basically, his midsection - all the muscles, bones and ligaments from above the knees to below the chest
  • Stand with your feet shoulder-width apart, and fold your arms across your chest .
  • Bend your knees and lean forward slightly .
  • Rotate your trunk in your backswing motion .
  • Continue from the top of your backswing position to your follow-through.
  • At home, you may want to try this stretch in front of a mirror to check the different positions of your swing.
  • The importance of golf stretches

Golf stretches can help prepare you for a day on the course. These golf stretches may help promote a fluid, full golf swing, which can improve your performance.

 Before you start your golf stretches, warm up with five to 10 minutes of light activity, such as walking around the practice tee. If you have time, complete the full series of golf stretches outlined here.

Hold each stretch for about 10 seconds. Repeat three to five times. Do one set of golf stretches every day and another set before and after each round of golf. Keep stretching gentle. Don't bounce. If you feel pain, you've stretched too far.

Golf stretches for your quadriceps


Start off your golf stretches by first stretching your quadriceps, which are the muscles in the front of your thighs:
  • Stand with your back to a chair or bench and cross your arms over your chest. Place your left foot on the chair or bench (image 1). You can use a chair with a lower seat than the one shown here.
  • Keep your left knee even with or behind your right knee. Tighten your left buttock muscles. You'll feel a stretch in the front of your left thigh.
  • To mimic your back swing, rotate your shoulders and torso to the right and bend your left shoulder and trunk slightly toward the ground
  • Repeat the stretch on the opposite side.

Golf stretches for your back


Next, stretch your back muscles:
  • Stand with your feet apart, facing the back of a chair.
  • Grasp the back of the chair with your hands.
  • Holding on to the chair and keeping your spine straight, move your body down and away from your hands until you feel a stretch near both armpits.

Golf stretches for your hamstrings


Now move on to your hamstrings, which are the muscles in the back of your thighs:
  • Hold your golf club behind your shoulders. Stand next to a step, low table or tee bench. Put your right foot on the step and bend your right knee slightly .
  • Bend your upper body forward at your hips, keeping your spine straight until you feel a comfortable stretch in the back of your right thigh.
  • Maintain this stretch while rotating your back and shoulders to the left and to the right.
  • Repeat the stretch on the opposite side.

Golf stretches for your hips while seated


You can stretch your hips several ways. Try this seated stretch first:
  • Sit on a chair, low table or tee bench. Place your right ankle on top of your left thigh .
  • Push down on your right knee with your right forearm. Then lean forward at your waist until you feel a gentle stretch in your right hip.
  • Repeat the stretch on the opposite side.


Check out some great Putting Tips

Take a look at a great set of videos of YOGA FOR GOLFERS  

Golf stretches for your hips and back


Then try this hip and back stretch:
  • Sit on a chair, low table or tee bench. Place your right ankle on top of your left thigh. Raise your right knee and grasp it with your left hand .
  • Keeping your spine straight, pull your right knee up toward your left shoulder. You'll feel a stretch in your right buttock.
  • Mimic the position of your right hip when you're at the top of your back swing by turning your shoulders to the right .
  • Repeat the stretch on the opposite side.

Golf stretches for your front hip muscles


Here's a final hip stretch:
  • Kneel on your right knee, holding your golf club with your right hand. Place your left foot in front of you, bending your knee. Place your left hand on your left leg for stability (image 1).
  • Keep your back straight and abdominal muscles tight. Lean forward, shifting more weight onto your left leg (image 2). You'll feel a stretch in the front of your right hip and thigh.
  • Repeat the stretch on the opposite side.

Golf stretches for your wrists


Now stretch your wrists upward:
  • Hold your right arm in front of you with your palm facing down.

  • Keeping your elbow straight, gently pull your wrist up by grabbing the top of your fingers.
  • Repeat the stretch on the opposite side.
Next stretch your shoulders:
  • Stand with your feet shoulder-width apart as though you're addressing the golf ball. Hold your left elbow with your right hand.
  • Keeping your left thumb pointed up, bend your left wrist toward your left thumb.
  • Rotate your trunk to the right.
  • Pull on your left elbow until you feel a stretch in your back.
  • To stretch the trailing (right) shoulder, grab your right elbow with your left hand. Then rotate your trunk to the left.

Golf stretches for your core muscles

Stretch your core muscles:
  • Stand with your feet shoulder-width apart, and fold your arms across your chest .
  • Bend your knees and lean forward slightly .
  • Rotate your trunk in your back swing motion .
  • Continue from the top of your back swing position to your follow-through.
  • At home, you may want to try this stretch in front of a mirror to check the different positions of your swing.
    Golf Swing Yoga

    Every small imbalance ruins your perfect swing

    Golf is a gentle sport, right? Think again!
    A golf swing travels at 100 mph and involves potentially dangerous twisting of the spine. And a typical player makes something like 120 swings during the average round of golf.
    That's a lot of wear and tear!
    If your body isn't in balance, every one of those swings takes you one step closer to injury.
    And every small imbalance you carry gets in the way of the PERFECT SWING. Tight hips, weak shoulders and a lack of mobility in the upper back can all sabotage your best efforts at great technique.
    You can spend as many hours as you like with an expensive golf pro. It won't make any difference to your game if your body can't do what your pro is asking.

Wednesday, April 11, 2012

Calming Yoga Poses

Just before bedtime, feel the stress melt away by trying these 5 calming poses 


Yoga Pose to help you Sleep

Sleeping Swan
This relaxing yoga pose targets neck, shoulders, back, hips, and legs.

Sit on floor with a pillow in front of you. Bend left knee, bringing sole of left foot to right inner thigh. Lift butt and extend right leg behind you.

Staying centered, gently hinge forward from hips, placing head on pillow. Extend arms forward, elbows slightly bent

Hold for 8 to 10 breaths. Roll back up. Switch legs; repeat.
Tip: With each pose, breathe in and out through your nose to soothe the central nervous system.
Happy Baby
This relaxing yoga pose targets back, hips, and hamstrings.

Lie faceup. Bend knees into chest and grab inside edges of feet with hands, palms out.

Bring knees out to sides, then lower toward armpits, keeping heels above knees, feet flexed.

Hold for 8 to 10 breaths, gently rocking from side to side.

Bridge
This relaxing yoga pose targets hips and legs.

Lie face up with knees bent, feet flat on floor, arms extended by sides, palms up.

Keeping shoulders down, engage abs and press into heels to lift hips and back to form a diagonal line from shoulders to knees.

Hold for 8 to 10 breaths; lower

Seated Side Bend
This relaxing yoga pose targets neck, shoulders, back, and oblique’s.

    Sit on a pillow in a cross-legged position. Place left hand on floor to side of hip, left elbow slightly bent.
     
  Extend right arm by ear.

    Lean to left, keeping butt on floor, shoulders down.  
 
    Hold for 8 to 10 breaths. Switch sides; repeat

Rag Doll 
This relaxing yoga pose targets neck, shoulders, back, and oblique’s. 
    
    Stand with feet hip-width apart, knees slightly bent. Place right hand on left elbow, left hand on right elbow 

   Bend over from hips, letting arms and head hang down. 

  Hold for 8 to 10 breaths. Gently roll back up

Tuesday, April 10, 2012

Stability Ball Exercises for Golf

The big stability ball is great for golf, you can exercise, tone and strengthen you entire body on this rubber ball..
It is very important to strengthen your core , the central abs, obliques, lower abs, middle back and lower back and you will find doing exercises on a stability ball so much easier.


Here are some stability ball exercises for golf 

The Oblique Twist
This exercise works core with an emphasis of the central abs.
Place your upper body on the ball with the small of your back supported by the ball and your feet are flat on the ground.
Place your hands behind your head , exhale, squeeze your abs and curl your upper body up off the ball. 
Inhale and return to the beginning position, keeping your abs contracted throughout the entire exercise.

Abdominal crunch

To do abdominal crunches with the fitness ball:
  • Sit on the ball with your feet resting on the floor, about hip-width apart. Keep your back straight. Cross your arms on your chest.
  • Tighten your abdominal muscles.
  • Lean back, as shown, until you feel the muscles in your midsection tighten. Hold for three deep breaths.
  • Return to the start position and repeat
  • You can add a twist to the left , then a twist to the right to work the obliques.


Bridge

To work various core muscles in combination for better core strength, try a bridge with the fitness ball:
  • Lie on your back with your legs resting on top of the ball.
  • Tighten your abdominal muscles.
  • Raise your hips and buttocks off the floor into a bridge (A). Hold for three deep breaths. This works your core muscles and the muscles along your backside — the gluteal muscles and hamstrings — as they contract to keep you in place.
  • Return to the start position and repeat.
  • For added challenge, raise your right leg off the ball (B). Repeat with your left leg.

Plank

The plank is a classic core-strength exercise with the fitness ball:
  • Lie on the ball on your stomach, with your feet touching the floor behind the ball. Lean forward until you touch the floor with your hands.
  • Walk your hands away from the ball until you feel the ball reach your upper thighs, as shown. Keep your feet suspended above the floor while you balance on your hands and on the ball. Keep your shoulders directly above your hands.
  • Tighten your abdominal muscles. Hold for three deep breaths or as long as you can maintain your balance and form.
  • Return to the start position and repeat

Abdominal ball raise

To do the abdominal ball raise exercise with the fitness ball:

  • Lie on your back and rest your legs on top of the ball with your legs about hip-width apart. Tighten your abdominal muscles and squeeze your legs together.
  • Raise the ball off the floor, as shown. To protect your lower back, focus on pulling your bellybutton in toward your spine and keeping your abdominal muscles contracted. Hold for three deep breaths.
  • Return to the start position and repeat.
  • For added challenge, raise the ball off the floor and let your legs slowly fall to the right. Stop before you reach the floor. Hold for three deep breaths, keeping your shoulders on the floor. Return to the start position and repeat on the left side.
     
     
  • Side exercise
  • To do the side exercise with the fitness ball:
  • Lie on your right side, with the ball between your legs. Support yourself with your arm along the floor.
  • Tighten your abdominal muscles.
  • Keeping the ball between your legs, raise your legs off the floor, as shown. Hold for three deep breaths.
  • Return to the start position and repeat. Also try the exercise lying on your left side.
  •  
  • So as you can see these are 5 easy and fun exercises you can do in front of the tv and this will help build up your core muscles and help your coil and flexibility to make you hit that ball further and take the pressure off your lower back.

    Friday, April 6, 2012

    Seated Yoga Poses for Golf

    Here are some seated Yoga poses that will help your flexibilty for golf, you can do these while you are watching tv.

    Seated Spinal Twist Pose 

    Sit on the floor with both legs straight out in front of you. Bend your right knee with the right thigh on the floor, cross your left leg over your right thigh, and place your left foot flat on the floor next to your right knee.

     Put your left hand flat on the floor behind you with the arm straight, palm down, fingers pointing away from you. Inhale and turn slightly to the left. Bend your right arm and place your right elbow on the outside of your left knee. Keep your shoulders down. Exhale and twist your spine and push your chest forward to lengthen the spine.

    Don't over twist your neck. Keep the twist the full length of the spine for full benefit. Hold. Inhale and return to starting position and repeat on the other side. If this is too difficult, keep your right leg straight and bend left leg over the right leg with the left foot flat on the floor on the outside of the right thigh. Hold the left knee with your right elbow. Place your left hand on the floor behind your back and twist.

     Benefits: Gives the spine a nice lateral stretch, increasing spinal elasticity. Also improves side-to-side mobility; decreases backaches and hip pain; contracts and tones the liver, spleen and intestines; reduces abdominal size; improves the nervous system; prevents calcification at the base of the spine; frees the joints.


     Seated Forward Bend Pose 

    Sit erect, legs straight, pelvis tipped forward, feet perpendicular to legs. Inhale. Raise your arms straight ahead. Exhale, stretch forward and down. Keep back straight. Place hands comfortably on legs, whether on knees, calves or ankles. Relax, allowing chest to sink toward thighs without arching your back.

     Breathe softly and hold this posture for 4-5 breaths


     Benefits: Gives an intense stretch to the entire back, massages the abdominal organs, increases flexibility of the spine, fosters a sense of calm and letting go


    Boat Pose

    Sit on floor with spine erect, knees up and bent, and feet flat on the floor. Hands hold onto the backs of the thighs. Lean backward and balance on the "sitting" bones. 
    Tips of the toes remain on the floor. Straighten your legs. Straighten your arms alongside your legs, palms facing in. If your back rounds as you straighten your legs, bend your knees slightly. Hold.

    Benefits: Tones the abdominal muscles, strengthens the thighs and knees, increases stamina